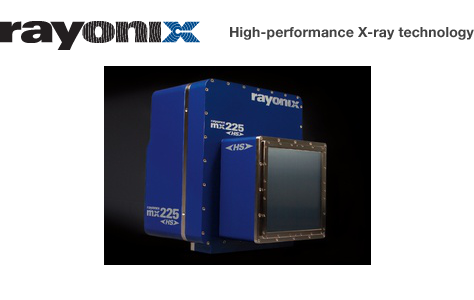
Rayonix HS camera

Introduction
The MX-HS series from Rayonix incorporates the new, exclusive HS frame-transfer technology for high speed X-ray data collection without compromising resolution or data quality. The result is a new type of high speed and ultra-low noise area detector that delivers the highest performance available for X-ray diffraction applications.
The Rayonix MX-HS detectors are ideal for taking advantage of high brilliance synchrotron sources, or for any other high frame rate application. Examples include: high throughput protein crystallography, Laue diffraction, time-resolved or static small-angle X-ray scattering (SAXS), wide-angle X-ray scattering (WAXS), powder diffraction, X-ray computed tomography (CT), X-ray imaging, and coherent diffraction imaging (CDI). With no count rate limitation, these detectors are also ideal for XFEL applications.
The Lima module as been tested only with the following models :
MX170-HS (2x2 mdules)
Prerequisite
The Rayonix HS detector is been delivered today with its own control computer, a powerful computer embedded at leat 8GB of RAM, dual 4-Core CPU (8 cores) and a GPU card for the online image correction (background, flatfield …). The computer is running redhat entprise Linux 6 (64bits).
The rayonix SDK is preinstalled on the detector node under the directory /opt/rayonix.
There is no special prerequisite, you can test that the device works properly by running the rayonix GUI, caxpure.
Installation & Module configuration
Follow the generic instructions in Build and Install. If using CMake directly, add the following flag:
-DLIMACAMERA_RAYONIXHS=true
For the Tango server installation, refers to PyTango Device Server.
Initialisation and Capabilities
Implementing a new plugin for new detector is driven by the LIMA framework but the developer has some freedoms to choose which standard and specific features will be made available. This section is supposed to give you the correct information regarding how the camera is exported within the LIMA framework.
Camera initialisation
The camera has to be initialized using the RayonixHsCamera class. The default constructor does not need any input parameter.
Std capabilities
This plugin has been implemented in respect of the mandatory capabilites but with some limitations which are due to the camera and SDK features. We only provide here extra information for a better understanding of the capabilities.
HwDetInfo
The detector is set to full image size at startup which means a binning of 1x1.
Note
The recommended binning for most of the experiment is 2x2.
HwSync
The minimum latency time is 1 ms.
The supported trigger modes are depending of the chosen frame mode. There are:
IntTrig
IntTrigMult
ExtTrigSingle
ExtTrigMult (only for SINGLE frame mode)
ExtGate (only for SINGLE frame mode)
ExtTrigReadout (only for FAST_TRANSFER frame mode).
Optional capabilities
HwBin
The supported hardware binning are 2x2, 3x3, 4x4, 5x5, 6x6, 7x7, 8x8, 9x9 and 10x10. By increasing the binning factor you can increase the readout speed from 2.6 fps to 140 fps which corresponds respectively to a pixel size of 44um and 440 um.
HwShutter
The Rayonix HS detectors provides 2 output channels one can choose a different source for each (see specific control parameters for more details about the output source control). For the SHUTTER source both opening and closing delay can be set.
The Rayonix HS shutter capability only supports two modes:
ShutterAutoFrame
ShutterManual
Specific control parameters
Some specific paramaters are available within the camera hardware interface. Those parameters should be used carefully and one should refer to the camera SDK (or user’s guide) documentation for a better understanding.
get/setFrameTriggerType(type): signal type for the frame trigger input (channel #1)
get/setSequenceGateSignalType(type): signal type for the gate input (channel #2), The supported signal types:
OPTO
OPTO_INVERTED
CMOS
CMOS_PULLDOWN
CMOS_PULLUP
CMOS_PULLDOWN_INVERTED
CMOS_PULLUP_INVERTED
SOFTWARE
get/setOutputSignalType(channel, type): the signal type for the output channel (CHANNEL_1 or CHANNEL_2)
get/setOutputSignalID(channel, id): the source id for the output channel, possible sources are:
ID_SHUTTER
ID_INTEGRATE
ID_FRAME
ID_LINE
ID_SHUTTER_OPENING
ID_SHUTTER_CLOSING
ID_SHUTTER_ACTIVE
ID_TRIGGER_RISE_WAIT
ID_TRIGGER_RISE_ACK
ID_TRIGGER_FALL_WAIT
ID_TRIGGER_FALL_ACK
ID_TRIGGER_2_RISE_WAIT
ID_TRIGGER_2_RISE_ACK
ID_INPUT_FRAME
ID_INPUT_GATE
get/setElectronicShutterEnabled(): active or unactive the electronic shutter
get/setCoolerTemperatureSetpoint(): the cooler temperature set-point
get/setSensorTemperatureSetpoint(): the sensor temperature set-point
get/setSensorTemperature(): the detector measured temperature
get/setCooler(): stop or start the cooler controller
get/setVacuumValve(): close or open the vacuum valve
get/setFrameMode(): modes are SINGLE or FAST_TRANSFER.
Warning
in FAST_TRANSFER mode the latency time is disabled and it has a fixed value of 1 ms which corresponds to the readout time. In addition to this the supported trigger mode will depend on the frame mode. The list of supported trigger modes is available in this document below.
Configuration
Cabling
The detector head should be connected to the detector computer on the cameralink and USB links. You must connect the USB on the PCI board (not the motherboard ones) and the cameralink on the first channel, the top connector.
Cooling
For an optimized condition wit dark current the detector has to be cooled down, the sensor temperature set-point should be at -120 deg and the cooler temperature set-point at -90 deg Celsuis. And of course the cooler controller should be started.
How to use
This is a simple python test program:
from Lima import RayonixHs
from lima import Core

cam = RayonixHs.Camera()
hwint = RayonixHs.Interface(cam)
control = Core.CtControl(hwint)

acq = control.acquisition()

# configure some hw parameters
sens_temp = hwint.getSensorTemperature()
cool_temp = hwint.getCoolerTemperatureSetpoint()
if sens_temp > -50:
  print " Hoops, detector is not cooled down, temp = ", sens_temp

# setting new file parameters and autosaving mode
saving=control.saving()

pars=saving.getParameters()
pars.directory='/somewhere/'
pars.prefix='test1_'
pars.suffix='.edf'
pars.fileFormat=Core.CtSaving.EDF
pars.savingMode=Core.CtSaving.AutoFrame
saving.setParameters(pars)

# set a new binning to increase the frame rate
image = control.image()
image.setBin(Core.Bin(2,2))

# now ask for 10ms sec. exposure and 100 frames
acq.setAcqExpoTime(0.01)
acq.setNbImages(100)

control.prepareAcq()
control.startAcq()

# wait for last image (#xi99) ready
lastimg = control.getStatus().ImageCounters.LastImageReady
while lastimg !=99:
  time.sleep(1)
  lastimg = control.getStatus().ImageCounters.LastImageReady

# read the first image
im0 = control.ReadImage(0)